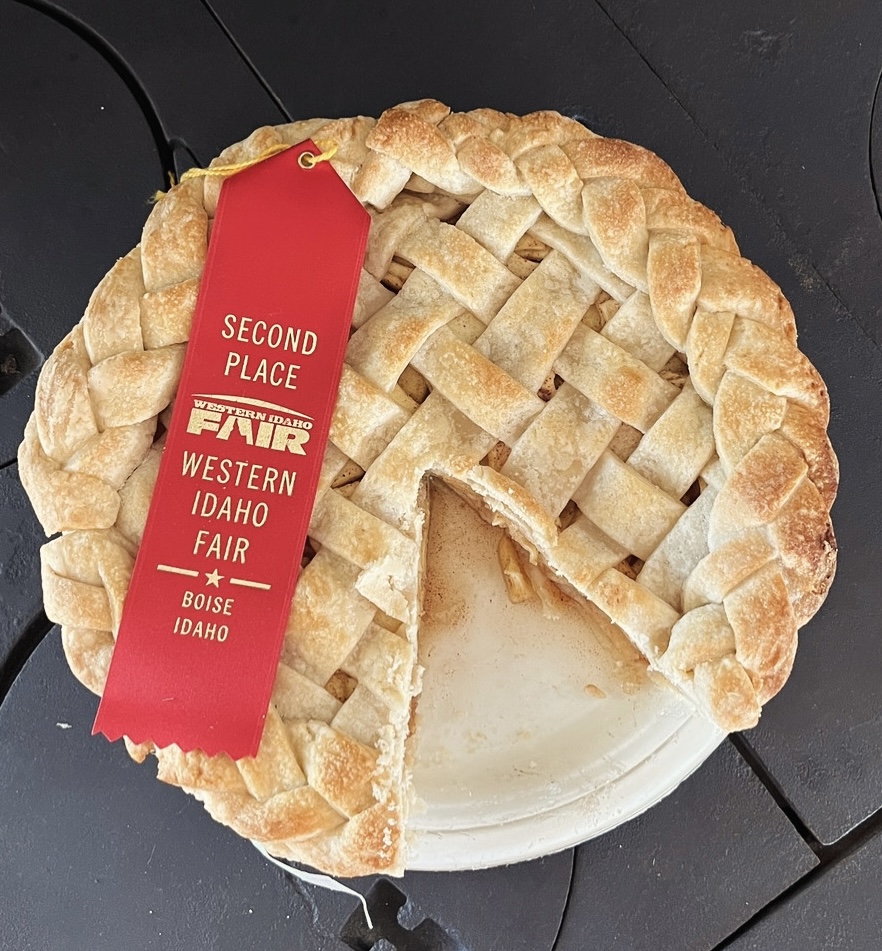
This apple pie recipe is special to me. It is so much more to me than an award-winning recipe. It represents a time in my life when I did something out of my comfort zone and it ended up being a dream come true! I always loved watching my older sister bake pie so it has always been something I have wanted to learn. As I researched recipes, I was able to come up with one that checked all the boxes- both for me and my taste testers! And since it’s a classic, apple pie was the first flavor that I really perfected. With so much positive feedback about my apple pie, my husband Ben encouraged me to enter one into our state fair. I took it more as a joke because there was no way I was doing something like that. Somehow he convinced me though, and I soon found myself in my kitchen braiding pie dough and peeling apples, trying to make the most perfect pie for the state fair. I was surprised at how excited I was when we went to drop off my pie. I was proud of my work and definitely anxious to see how I would do. Well fast forward to a few days later, we showed up at the state fair and went straight to the pie display to see what the result was. This is where my nervousness kicked in a little more. I didn’t want to look! So Ben went up to the display and I will never forget the feeling I got as he turned around and smiled at me. My pie got a 2nd place ribbon! 2nd place! I was stunned and just down-right tickled! I was ecstatic that I had won a ribbon, but I couldn’t help but feel like this was a symbol of the journey I had been on. Since becoming a wife and a mom, it has been hard to find myself. I had exhausted a lot of hobbies and pass-times to no avail. But when I started baking, I felt like I had found myself. I found something that brought me joy and fulfillment. Seeing that 2nd place ribbon on my pie was a truly rewarding moment… in every way!
So I would like to share the recipe for my pie crust and my apple pie filling!
For the crust:
- 2 3/4 cups all-purpose flour
- 2 tablespoons sugar
- 1/2 teaspoon salt
- 1/2 cup butter, chilled
- 2/3 cup shortening
- 1/2 cup water, chilled
For the filling:
- 5-6 large apples, cored, peeled, and sliced (I like Cosmic crisp or honeycrisp apples)
- 3/4 cup sugar
- 2 tablespoons all-purpose flour
- 1 tablespoon lemon juice
- 1 teaspoon ground cinnamon
- 1/4 teaspoon ground ginger
- 1/4 teaspoon ground nutmeg
- 1/4 teaspoon salt
Instructions:
- Start by making the pie dough. In a medium mixing bowl, add the flour, sugar, and salt.
- Next, cut the butter and shortening into squares and put in the bowl with the dry ingredients.
- Cut in the butter and shortening with a pastry blender or a butter knife and fork. Keep mixing until it is crumbly.
- Start adding the chilled water, tablespoon by tablespoon until a dough starts to form (can be up to 1/2 cup). If the dough is sticky, it is too wet. If it is falling apart easily, it is too dry. You want it to keep its shape without being too sticky or hard to handle.
- Form your dough into a ball, cover it with cling wrap and put it in the fridge to chill for at least an hour.
- While the pie dough chills, make the filling. Start by coring, peeling, and slicing your apples. I like to use a KitchenAid apple peeler attachment. It will save you a lot of time and effort. If you don’t have one, simply cut and peel the apples with a paring knife.
- Once the apples are cored, peeled, and sliced, add them to a large mixing bowl. Then add the lemon juice and other dry ingredients and mix. (I like to use a wooden spoon)
- At this point, preheat your oven to 375 degrees.
- Set aside your filling and get your pie dough out.
- Cut it in half with a butter knife and form each half into a disc shape.
- On a floured work surface, begin rolling out your dough. (I like to flour my rolling pin as well). Roll the dough into a circular shape to where it is about 2 inches larger than your pie dish.
- Transfer the rolled-out dough into your pie dish. There are a couple different ways to do this. I like to use my rolling pin. You can also gently fold your dough into fourths, place it in your dish, and then unfold it to fit in your pie dish.
- Trim away any excess dough from the rim. Now pour in the prepared filling.
- Repeat the rolling out process with the other half of the pie dough and then transfer it to the top of your pie.
- Tuck the excess dough under the bottom crust and crimp the edges.
- Using a sharp knife, cut 3-4 small slits in the top center of your pie. This creates a way for steam to escape while the pie is baking.
- Place your pie in the oven and bake for 35-40 minutes.
- Allow the pie to cool and set for about 30 minutes.

